This semester has taught me a lot. the massive workload of juggling my own project, which i tried to push as far as possible rig wise, working for two other teams on challenging rigs, juggling a steadily increasing working hours outside of uni and working freelance for outside clients all while maintaining a sport has defiantly taught me the meaning of hard work.
I am glad of how far i have come in this semester skill set wise, undergoing courses in python and scripting alongside my uni work has benefited my when it comes to rigging. I am glad to have worked within a strong team that were keen to help each other improve. Feedback from the team was great throughout the project, every member was happy to listen and look at what i was doing in order to give me whatever input they could. I now feel confident enough to step out into the industry and work along side professionals and learn from them.
Im glad i got the chance to work with the team i did this semester. i dont think i would of been given the room to develop as i have with a different group of people.
For Gregs module we were tasked to look out into the industry and try and make contacts that would increase are likelihood of getting on with are career within the industry as soon as we leave uni. We were also tasked with designing and creating are end of year show and bringing in guests. The final part of are module was to create are website, showreel and Cv.
Industry Engagement
Dingle International Film Festival
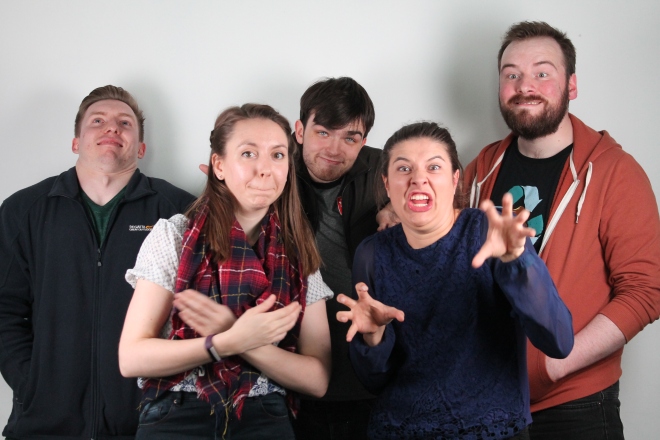
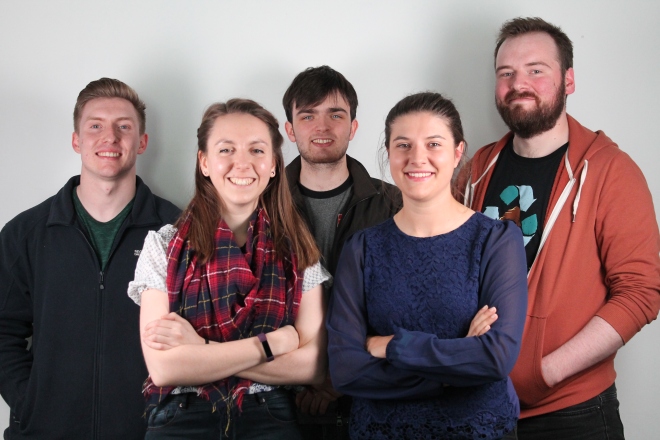
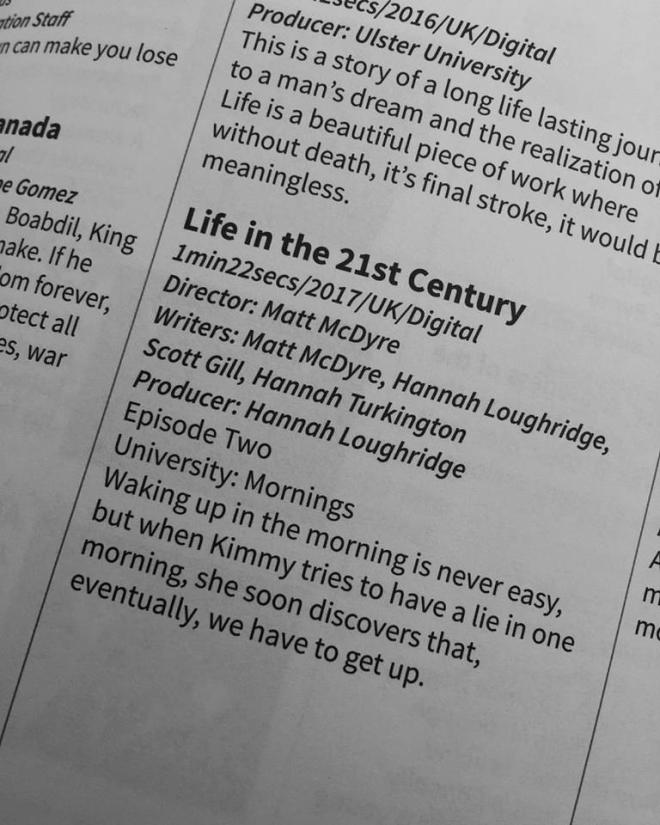
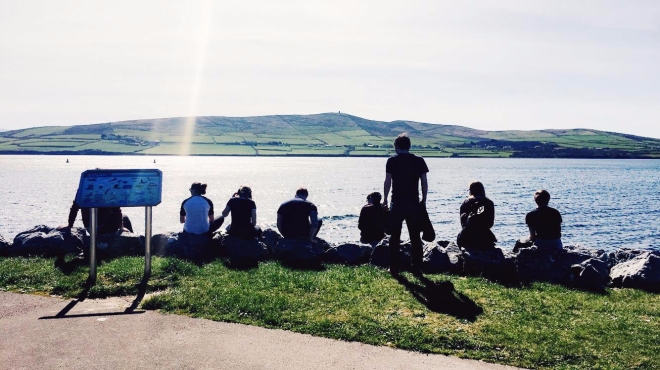
Myself and a few classmates decided to drive down and stay in Dingle during the international film festival. My team all went as our film Life in the 21st Century was selected for the festival. (handy for starting up conversations with people down there)
During are brief time in Dingle we joined in on the nightlife fun and met some interesting people.
thanks to Greg i was able to get into contact with Adam McAllister, previously of Brown Bag Studios. Adam was great on offering careers advice as well as feedback on my work. Currently i am the only person specializing in rigging in the class so having critique from someone else was a big plus.
Adam has also been invited to the end of year show.
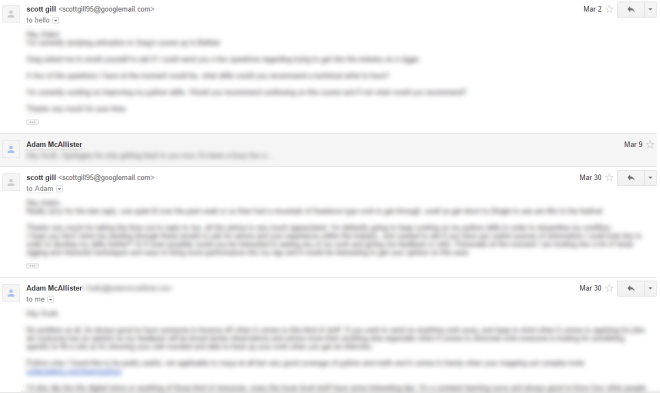
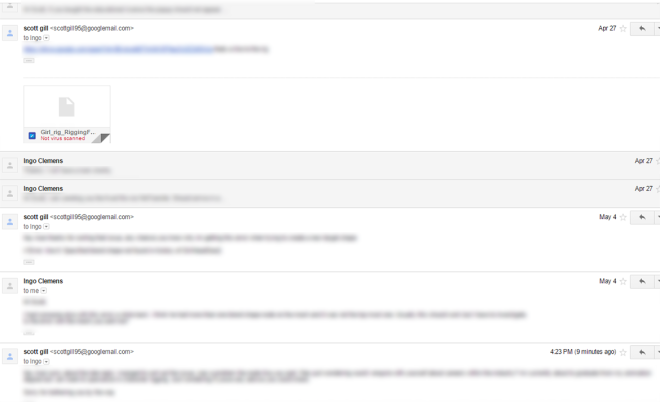
Another goldmine i stumbled onto by mistake was when i purchased my license to SHAPES, i had a issue regarding the license pop up. When i emailed to get the bug sorted i noticed the person i was emailing was actually the developer of the plugin itself. I was able to get into a conversation about careers and skills in the industry and was even able to send some rigs over email for critique and help with bugs.
Finally after having a meeting the Jam Media my lecturer emailed the company and recommended myself as a character technical artist for some of there new shows.
I have also been chatting on Linkedin with riggers from companies such as BlueZoo
As a team myself and the rest of the guys had a meeting in NI screen with Andrew Reed about what it takes to get funding from NI screen. we obtained a lot of useful information about possible ways of being able to work on are own short films as well as create a income, by taking on advertising and small commercial gigs on the side.
End of Year Show
For a section of are module we have to organize are end of year show and create a display. I was part of the committee for making decisions, during the meetings is were the major ideas were bashed out for the show and how everything was going to work.
Major credit has to be given to Niamh for the work she put into organizing everything, Matt for his work on getting Us Folk to sponsor and help design the show and Hannah Turkington for helping out with getting display boards sorted.
Sadly during a lot for a lot of the cleaning of the room i was unable to attend due to working. Although i was around for the setting up of the boards and also carrying in the Tvs and tables for everyone. Myself and Hannah Loughridge worked together to get the prints finished for are wall. I worked on getting the cardboard cutout printed for the show as well.
This module has made a great impact into my final year. the collaboration between the year has been great in organizing events and developing creative relationships between are work.
Working alongside my team while having the ability to pass work to individuals within the industry was a amazing bonus in developing my skills while engaging within the industry. Having the meeting with NI screen opened my eyes to the possibility of working on my own IP while working commercially as well to sustain a small project.
For items such as my showreel i wanted to show that i can be versatile with my work while also showing strong technical skills.
All in all making connect to the industry outside of NI was insightful and inspiring and im looking forward to were my career will take me.
Once the character sculpt had gotten far enough along i began the rigging process using my proxy rig, which had be previously developed for pre-vis, to create my final character rig for the little girl character. Myself and Hannah Loughtridge had alot of back and forth during this early stage trying to get her shape to move and flow nice in 3D, the most problematic area was the lower jaw and chin area.
Above: shows the basic setup of the character rig structure
Torso
The character’s torso did not require a lot of special treatment as it would be a simple biped IK/FK rig with a triple layer system for the hands. One interesting area i was able to develop through my research into a few different spine rigging methods such as a divine spine as the ability to make the FK controls follow the IK spine without applying double transforms, as this was a previous annoyance for some of the animation team when moving a IK control the IK stayed unaffected.
the head and neck were developed the same why i had worked for my early tests allow for both rotation space switching of the entire head from the torso and also rotation switching from the neck and head to allow the head to be pulled forward and side to side will remaining level.
Hands
As mentioned before the hands have a triple layer setup, master finger control > single finger control > single joint FK control. This was implemented after the success i had with it last semester due to its practicality when animating. It is a easy and quick way to block out animations and add fine tweaks
Global
For the global of the rig i decided to create a hierarchy of three controls to allow for maximum freedom for the animator. For example in the animation phase Hannah Loughridge was able to attach the top layer of the global to a curve to have the character follow along a motion path, she is then able to move the second or third layer of control in order to offset the character from the path while it still follows the direction. This effect is useful to have the character walk over bumps or adjust the height.
Above: the global layer system allowing for the character global to be shifted to rotate from the top or bottom or anywhere desired by the animator. Also allowing for motion path ability or parenting
Props/Clothing
As previously thought the main issue would be in developing solutions to issues brought about by her clothes and school bag.
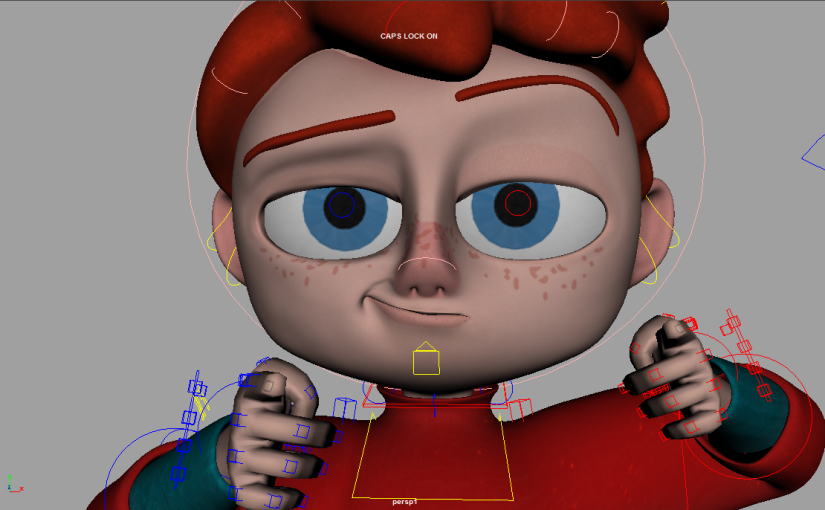
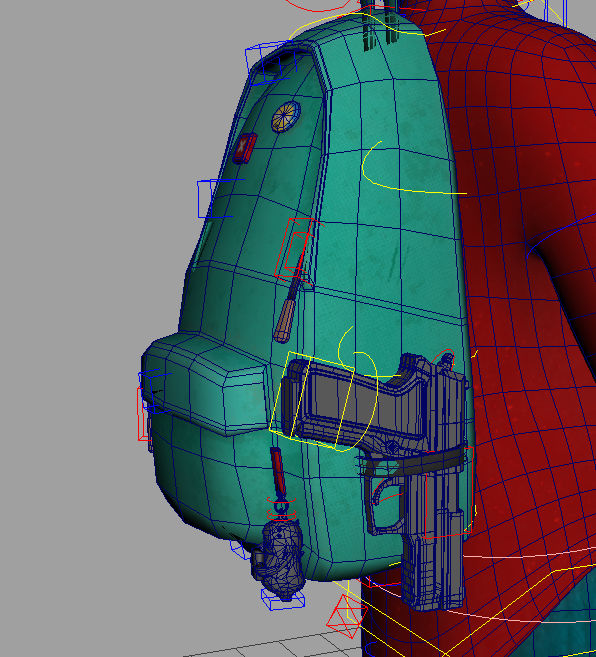
For the bag i developed a system of joints driven by control curves. These joints and curves were placed into a specific hierarchy to allow for the bag to move and appear as if it had something inside it giving it weight. The main issue with the bag was getting it to follow the spine when twisting but then raise up the back, how a real bag shoulder, when she is bending over.
I came up with a solution to the above issue by developing a IK spline which is driven by a series of joints that are rotated around the spine. this information is then fed into the Spline rig to allow for a nice twist while still maintaining the curve of the spine bend.
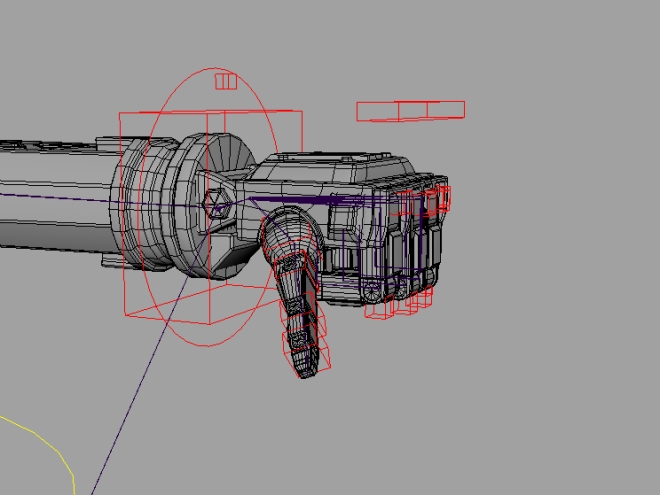
Above: the bag and some of the prop rigging involved within the character
For the bag the props that were attached along with it also needed to be rigged to allow for convincing movement. The gun is a simple constraint rig allowing for a mechanical movement whereas the key rig is a IK spline Fk hybrid rig to give the animators complete freedom. For the gun a dual control had to be made to allow for the gun to be parented to the girls hand which a child control, which actually is the master of the gun geo, to allow for a offset to the girls hand if necessary.
One area i did not anticipate being a issue was the wellie boots. Due to the lose fit around the shin they would twist with the ankle and not have any counter twist like the leg itself. Although they still have to follow the shin bone when rotated in Y and Z so that it does not clip through the mesh. In order to achieve this i have to develop a system of IK handles and constraints in order to get the shoe to move as expected. As a lucky benefit i was able to turn this into a additional controller to allow for the offset of the top of the wellie and in turn allow for a wobble when making contact with the ground.
Above: Examples of the foot/shoe rig
This technique was then developed in order to allow for some overlapping action on the poncho collar. As well as having the offset control for the rim i also added a roll and pull joint around the edge to give more freedom to the animators as well as more believable results.
Above; Example of the poncho collar roll
In addition to the collar rig i have also created a dynamic joint rig for the bottom of the poncho which can be turned on and off. This allows the animators to turn the rig into manual and animate in full FK mode to achieve cloth motion or they can have it automated.
A late addition to the character which i had to deal with was the earphones. These were to be used in the credit scene and needed to follow the characters head during animation. This was attached to the character by using a wire deformer skinned to joints that are controlled by the rotation of the head. The joints also have offset controls in order to allow for any corrections required due to the automated rig following but also allow for some movement to be added. I had looked into creating a dynamic joint chain for this setup but it wasn’t practically due to the shape of the head and how it looked while moving.
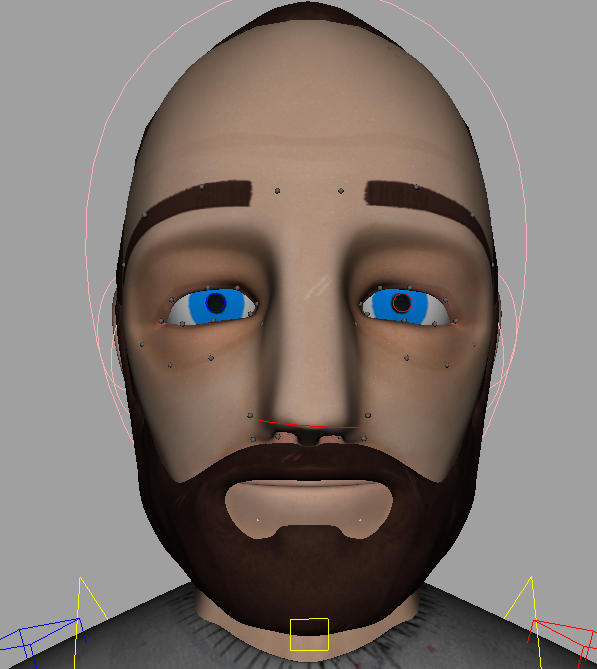
Facial Rig
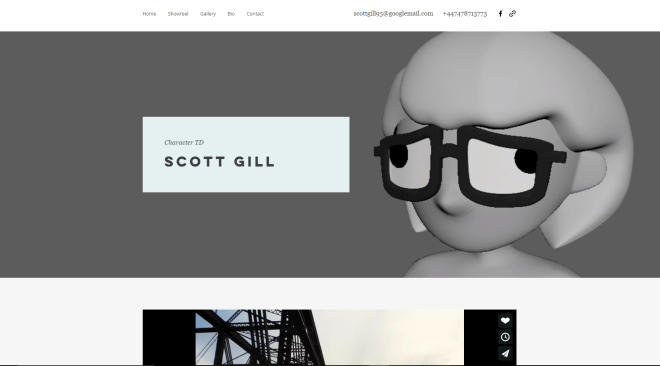
my main area of development with this character was in the face. My main problem with previous films made on our course is that characters with more realistic humanoid style there faces are always very lifeless and uncanny valley like.
Due to my research into facial rigging and its impact on the viewer from my dissertation i spent a long time working on developing a system for the eye and brow control as they play a huge part in portraying life in the character.
For most of the facial expression the mesh is deformed by joints which are placed along motion paths these joints are then controlled by a tweak control to allow for small facial twitches and movements for the animation team.
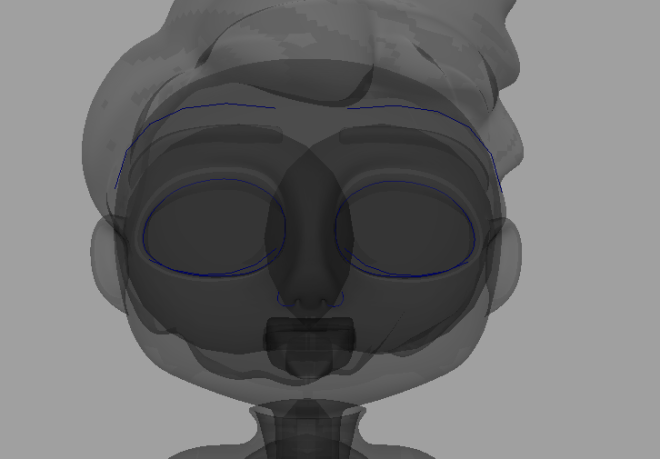
Above: Showing the position of the facial curves which are used to attach the bind joints to
The motion path curves themselves are blend shaped to create a different range of expressions, these blend shapes are then driven through a expression.
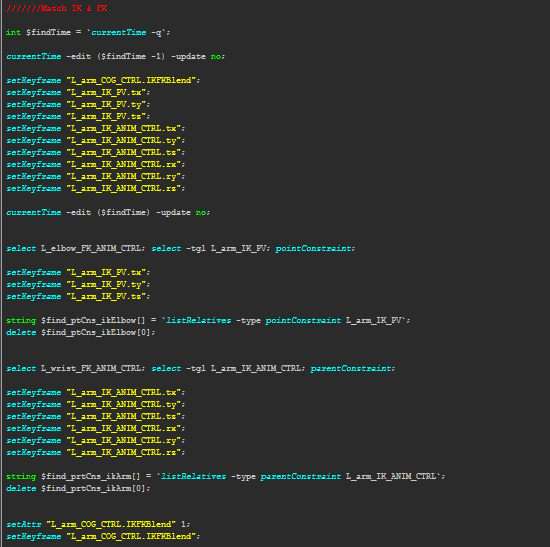
Above: Example of the script used to drive the blend shapes seen on the right
Once the curve blend shapes are created i then create some corrective shapes in order to achieve a higher standard of deformation, these blend shapes also include combo shapes to fix weird shapes from appearing when a series of shapes are fired off together. The mouth shapes are entirely created through blend shapes and combo shapes.
Above: Example of combo shapes in action showing a smile and then a smile/open shape firing at the same time with a corrective Combo shape to fix unwanted deformations.
This section of the rig was made incredibly quick and easy due to my implementation of SHAPES plugin for Maya. This allows for a quick workflow when developing facial rigs and splitting the shape to left and right sides as well as creating combo shapes, sequence shapes and inbetweens. The plugin also allowed me to easily transfer blend shape nodes from model to model as well as transferring sculpts between software such as Zbrush.
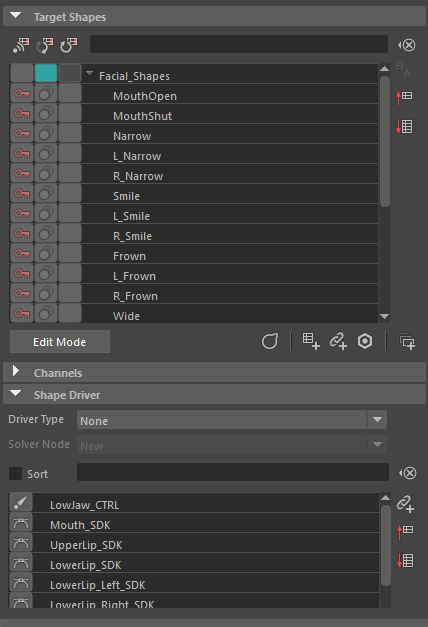
Above: Right are examples of the facial shapes before Combos/Correctives. Left is after new shapes have been applied
For the jaw itself it has a double joint setup for both upper jaw and lower jaw to allow for a character to rest there chin and still rotate the head up from the base is required. Additional blend shapes were used to create a squash when the jaw is rotated upward and create nice deformations when the mouth is opened.
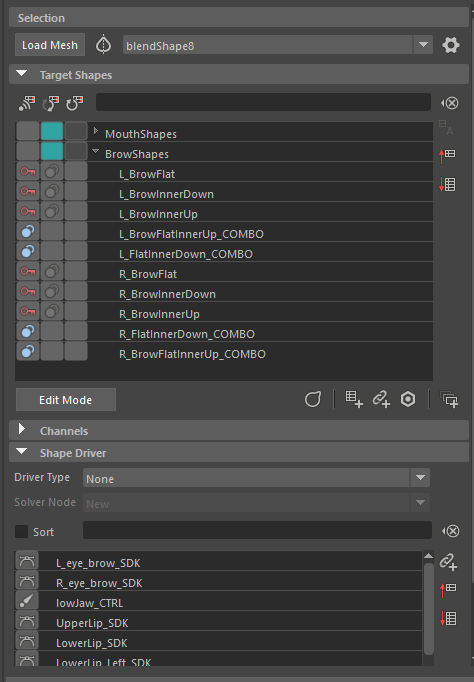
Above: SHAPES plugin user intereface showing my driver shapes and combo shapes.
Eyes
The eyes and eyelids of the rig were a small issue that required a interesting work around. Due to the scale of eyes and there interesting shape i had to develop a system to allow for full control but have the lids slide over the eyeball rather than clip through.
Essentially i had to create a center in the center of the eye ball geo, i then created my joints on the each of the selected vertices. these are than aim constraint to a locator placed on the joint position. this allows for the joints to follow the position of the locator without moving from the eyeball.
From here i draw a curve matching the eye lid shape follow the joint position. this curve is then attached to the locators through a PointOnCurveInfo node to allow for any changed in the curve to affect the locator and in turn the joints follow. This curve is then what is used to create the smart blink. Through a series of blend shapes and wire deformer i was able to develop a nice effect.
I found a tutorial online which taught me some scripts to speed up the process by automating the joint setup and curve PointOnCurveInfoNode.
This slideshow requires JavaScript.
As previously stated in the presentations in class i wanted to bring a certain level of realism into the character rigs the pupils needed to have some life and not be so dead pan. This would also allow for some stylized animation. This was created through two blend shapes driven by a attribute on the control curves. the Blend shapes were created using edge slide tool in Maya maintaining the circumference of the sphere at all times.
Face Rig Overview
The final touches to the facial rig were elements such as lip rolls and puckers as well as adding a tongue and tooth rig to create more expression. The lids were also hooked up to the network controlling the ye aim to allow for a realistic lid movement upon eye rotation. These subtle elements are key in bringing life into the character especially during some of are idle animations.
Scripting
throughout the project i have working on developing my python and Mel skills. a lot of the elements i have been working on are use for the rig itself in terms of controlling objects or creating specific setups. Most of the tools i have created which are used outside of the rig itself have been to speed up my own workflow in ways such as creating IK/FK switches and blends automatically or create things such as curves and have them orientated and in the same position as a selected object.
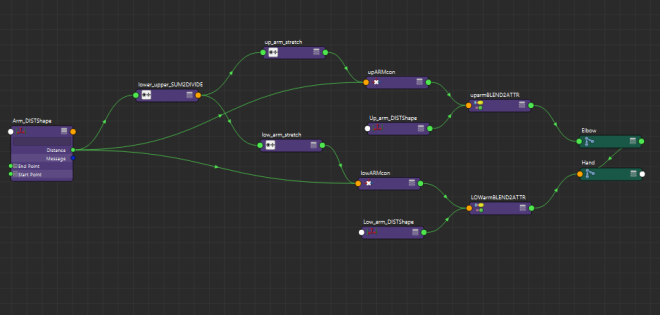
Although one tool i have created for the team is and IK/FK matching tool to allow for space matching between both functions of the arm. The reason i worked on developing this is to allow the animation team to be able to have an IK pose switch to FK without and popping or time consuming pose match up. This sped up scenes and allowed the animation to work a little easier.
Example of a section of the script
Finish
luckily there has been a rig in motion from quite early on within the project so any hiccups in my pipeline had been ironed out well before i got to the finalization point. The rig has been completed but my service on it has not ended as i have been on constant call to aid any issues regarding its performance. I have also been working on adding specific things that the animator requires through out there scenes.
For the character rig of the stranger there was a lot of changes along the way. As a team we decided around week 8 to revamp our story and in doing so the role of the stranger character changed as he was no longer going to have as much animation as previously thought. therefore by the time it got to week 8 there was a lot of unneeded rig work done but it was used as RnD for working on the facial rig and also to test new ideas and theories. Although the facial setups were done after each other the torso rigs were completeled sim
Body
For the stranger i ensured his rig was built identical to the girl. The reason for this was if we were going to use the animation library as discussed previously we would be able to build a library of poses which could be linked to either rig for example hand and finger poses.
For the male character his body movements after the story change are very minimum but as i was already so far along when the change came about i thought it would be beneficial to complete the rig, it is better to have and not need.
Just like the girl has a hybrid Divine spine setup that i created as well as the usual IK/FK controls and my triple layer finger system. The main issue with the stranger rig was creating convincing shoulder and neck shapes for his close up shot with the gun.
the shoulders were solved using a series of blend shapes to correct the issue as well as a few helper joints connected to move when specific values are triggered. I also applied this method to the elbows and use shape inbetweens in order to acheive a nice flow when bending the elbow.
For the neck it was a mixer of layered skin weights through NgSkinTools and some corrective shapes in order to achieve a nice shape when he moves.
The stranger also has the same ability to change position and rotation space when needed to allow for a more animator friendly environment to work in.
The stranger and every other rig i created this semester were weight painted by using NgSkinTools in order to have a nicer pipeline of work. The tool allows for layer shading and a lot of extra features the default Maya tools dont provide.
Above shows the layered shading in action.
i ensured for this entire semester that if i was weight painting a character i would do an initial block out of the skin weights so the team were not disrupted in terms of animation progress and as long as the rig was referenced the skinning would be complete without me having to rush it out.
Face
The stranger was the first of the two characters to be available to start my RnD for my facial setup. With the early pre-vis of the strangers head i had a good understanding how i was going to create the underlying structure of the rig but creating more polished finish would require more work.
Above shows a early version of the facial setup using curves along with no blend shapes attached.
After creating my first setup i got the high res head and moved onto automating creating my joint curves. This allowed my to spend less time on the technical and more time on the artistry of developing good deformations. Some of my design process had to be altered for the final rig to speed up production, as there was no longer any dialog in the film lip sync was no longer required so instead i focused on making exaggerated expressions of panic and sadness.
Once i had the curves in place similar to how the girls were created using my automated script. i moved onto the same process of using SHAPES to create blend shapes to clean up any deformations and add in combo shapes.
With the stranger i had a addtional level of concern which i had forgot about. The beard on his face is made from Geo and would also need to be skinned and follow the same steps that the underplaying face mesh went through.
Through the plugin i was able to bake my blend shapes into separate mesh and use them as my guide for developing the beard blend shapes.
The beard was a lot more tricky due to its odd shape but also the fact i had to try and keep it the same distance from the lips and nostrils to maintain continuity. Another issue was clipping, due to the shape of the face compared to beard i had to ensure the beard or face didn’t clip into each-other.
After completing the turtle rig for Niamh and her team she asked would i mind creating a character rig for her human character.
Due to my automated system i was able to knock this project out in a matter of hours and had it off to be animated. Although the first version i sent had very rough skin weighting due to time constraints on my own project, it was still able to be animated so the team wasn’t waiting around for me. Once i had a free minute i finished the skin weights and handed it off to Niamh. The human in the story doesn’t play a huge part in terms of motion so the rig didn’t have as many bells and whistles as it could have.
The largest part of the rig was getting the shoe laces to skin nicely with the foot.
Additional photos to come (awaiting finished render)
During the semester i was approached by Niamh because she needed a rig fixed, it had previously been rigged by Andrew Coyle but he disappeared. I wasn’t used to his pipeline and Hanks geo had been changed since the original rig was made so i decided it was quicker for myself to just rebuild. Thankfully my biped automation of IK/FK legs was able to be use for Hank.
Hank
I was instructed by Niamh that the geo should only been seen from one plane of view at a certain angle. This meant the model had been constructed to fit said angle. The models legs were asymmetrical and the entire mesh wasn’t sitting on any one axis.
Luckily i was very familiar with the story of Hank and understood what he needed to achieve. The character didn’t need a whole lot of special features. His animations would be low key but effect so i had to ensure any movement he did do was clean and nice. The first thing i did when receiving the rig was to rotate him to have his spine on some sort of a single axis plane. This made constructing his body and head rig a lot easier.
His rig was a IK/FK rig with a rigid spine, due to the shell being unable to bend. Although i put in place ways to adjust the shell and drop the shoulders and hips if needed for some exaggerated animation. Thankfully i had already be doing RnD for my own facial rigs so Hanks was a breeze and due to his derpy expression that he maintains throughout the animation his face didn’t need to be too fluid. The lower lip is jsut controlled by a series of joints attached to a motion path, each joint has a offset joint which is controlled by a control curve, the control curve is orientated through a locator alignment script i have and this allows the locator to follow the curve when it moves and in turn controls the offset joints.
A issue i had was due to the different leg shape each joint chain had to be made separately and re-orientated to fit the correct axis so all legs moved together as expected. Both legs are capable of IK/FK controls and have foot pad rotations as requested by Niamh and Shelley. His shell is capable of scaling in any direction (requested by Niamh) and the rig is able to invert on the X axis as the character doesn’t turn on a rotate base he just flips like a 2D character.
Additional photos to come (awaiting finished render)
One of the biggest challenges of the semester was working with Daryl, Blaine and Aidan to develop there character rig to be used for motion capture and put into Unity. This was a extreme challenge getting he rig to be usable by animators but also able to hold all the data required.
From the start i built up a simple IK/FK rig and showed Daryl my workflow, pipeline and sent him some scripts. Once i had most of the rig complete i handed it over to him to finish pieces off, while Blaine was working on a hand rig. Meanwhile Aidan was trying to carry the motion builder to connect to the character.
The initial tries ended in small success, we were able to get a pose to transfer but couldn’t get the animation to carry across. then when we tried to bring the data into Unity the rig exploded. The exploding issue was solved by Daryl, it turns out it was a global scaling issue.
One thing that Daryl found out that i worked on was that we needed a completely clean rig to place the motion capture onto in order to bring the data across, but this motion capture rig also needed to be controlled by the animation rig.
Sadly we were unable to get the hand rig from Blaine to attach to the animation rig so i went and rebuilt his version in order to have to connect within are pipeline. The mo-cap rig was a single hierarchy rig that had zero constraints or inputs other than the straight connect from joint to joint from the animation rig.
Thankfully we were able to get everything somewhat working together although issues still arise for some things during the workflow.
Additional photos to come (awaiting finished render)
Throughout the entire project my focus was on developing the character rigs into a higher standard of rig for my team to use. This focus lead me into hours of rig testing and development, constantly creating new quick rigs to test theories and techniques which could be applied to my character rigs.
During the year i also attended talks such as Skype calls from Mario Furmanczyk, a Walt Disney animator, were he talks about the production pipeline for animation. This was not directed at me sue to its heavy focus on animation but it was defiantly beneficial due to it adding to my understanding on what makes a good animation and how animators actually work within a pipeline.
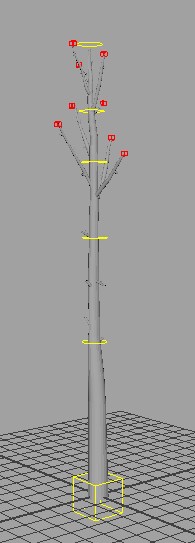
Trees
For trees in the scene we were planning on using Xgen to distrubtute them around the scene randomly. the idea came up about making aniamtion into the geometery so the trees would sway and move in the enviroment. I had developed too systems, A IK/FK control rig for the branches.
Or a dynamic joint curve when could be anaimated through CV controlers for additonal control.
Divine Spine
For the character spine i had discussed with Dan before the project how annoying it cna be when the FK spine doesn’t follow when you translate the IK controls which can lead to them being lost. I asked if he wanted a solution.
I found the Divine Spine online which a tutorial included in the PDF. through this i made my own version when i then was able to take pieces of in order to create the character spines that we use in the animation. The FK follows the IK without any double transformation.
The divine spine uses a triple layer setup, IK spline, IK handles and a third joint layer for control. It allows for complete freedom of rotation and twist.
The above setup was then tweaked into my own workflow and used to create the following results.
Face Tests
For Hunger i wanted to create the best facial rigs possible to allow the animation team to create the best representation of life.
to begin with i created a series of tests to bring the eye environment to life using a fleshy eye system.
This system uses expressions to control the eyelid movement through the eye rotation.
I also worked on developing a system for sticky lips to allow for a sense of moisture on the characters lips when creating expressions or speaking. This was wanted by myself to just add that extra level of polish to the animation.
This was also time to test the joint setup for the face to create expressions.
These setups were then pushed further and refined to create my facial setup for both characters.
Dynamic Joint Chains
Another key area i looked into while researching was dynamic joint chains for things such as her poncho. This would be useful for the animator to run automatically but they could also tweak the simulation by adding there own animation on top.
This system was later implemented into the base of the poncho and the her earphones.
Elbow Pinning
A piece of development that was later scrapped due to no longer being required was the ability to pin the elbow in place to allow the torso to move without the elbow breaking contact with the pin.
This was created through a series of nodes with the ability to switch it on and off.
Bag
Another section of reserahc was into rigging the props and the back of the girl.
I completed a series of tests and eventually the image seen above became what we have now shown below.
For this section section of the semester i have been focusing on some of the smaller prop rigs and enviromental pieces i need to create. The first thing i began testing was working out how the trees would move within Maya, this would either be aniamtied and simualted.
i began by looking at exteranl software that could be used to develop some complex tree sims, as we are using Xgen to populate are scene the trees would need to have the animation cached then be scattered throughout the scene that way.
Enviroment
the main pieces of software i looked into was SpeedTree.
This software seemed promising but due to the complexatity of obtaining a licence it became unpratical for us as a team but still reamins as a plan B option.
The follow up method i developed was within maya itself, i began by creating a IK spline rig to drive the tree branches manually. This animation could then be baked into the Geo and scattered through Xgen usinga script to drive the direction of fake wind. The second in Maya method i created was to use Nhair curves as solvers for my IK spline handels which control my joints. This method allowed for a complete simulated aniatmion which could then have belend shapes attatched ontop to allow for secondary control over the simulation. The benefits of this method is that it plays back in real time with no proformance issues.
Character Proformance
My major focus for this presentation was on the main aspects of our characters proformance, the hands and face. Thanks to some interesting articles and videos i found along with the help from my chriopractor friend i was able to devleop a nice neck and head setup that allos for a interesting orientation space switching to achieve some realistic results.
Aswell as developing a new system for space switching and movement i worked on developing a counter jaw setup to allow the upper jaw to open as if the character would be resting his chin on the floor of their hands. although not anotomically correct this allows for additonal control for the animators to work with.
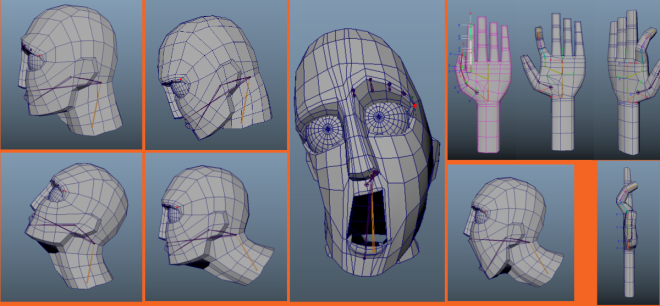
These early images are of a low poly early stage model that Matt created and i used to help develop a my facial rigging skills.
For the hands it was of an importance that the rig be nimble enough to be able to create whatever complex shapes required for a converstation through sign language.
Once i had this early version completed to a certain stage i moved onto the higher poly verison of the girl character that Hannah Loughridge created. Myself and Hannah have been in constant communication in order to achieve the best result possible. I will be rigging the character thne go back to Hannah to discuss anyway to make deformations or shapes have a better silloute.
Above shows the current progress as of today. The lower poly head will be what drives the higher version, these will be swapped when it comes to final renders.


")


")